

How To Trek To Mount Everest Base Camp and What to Expect
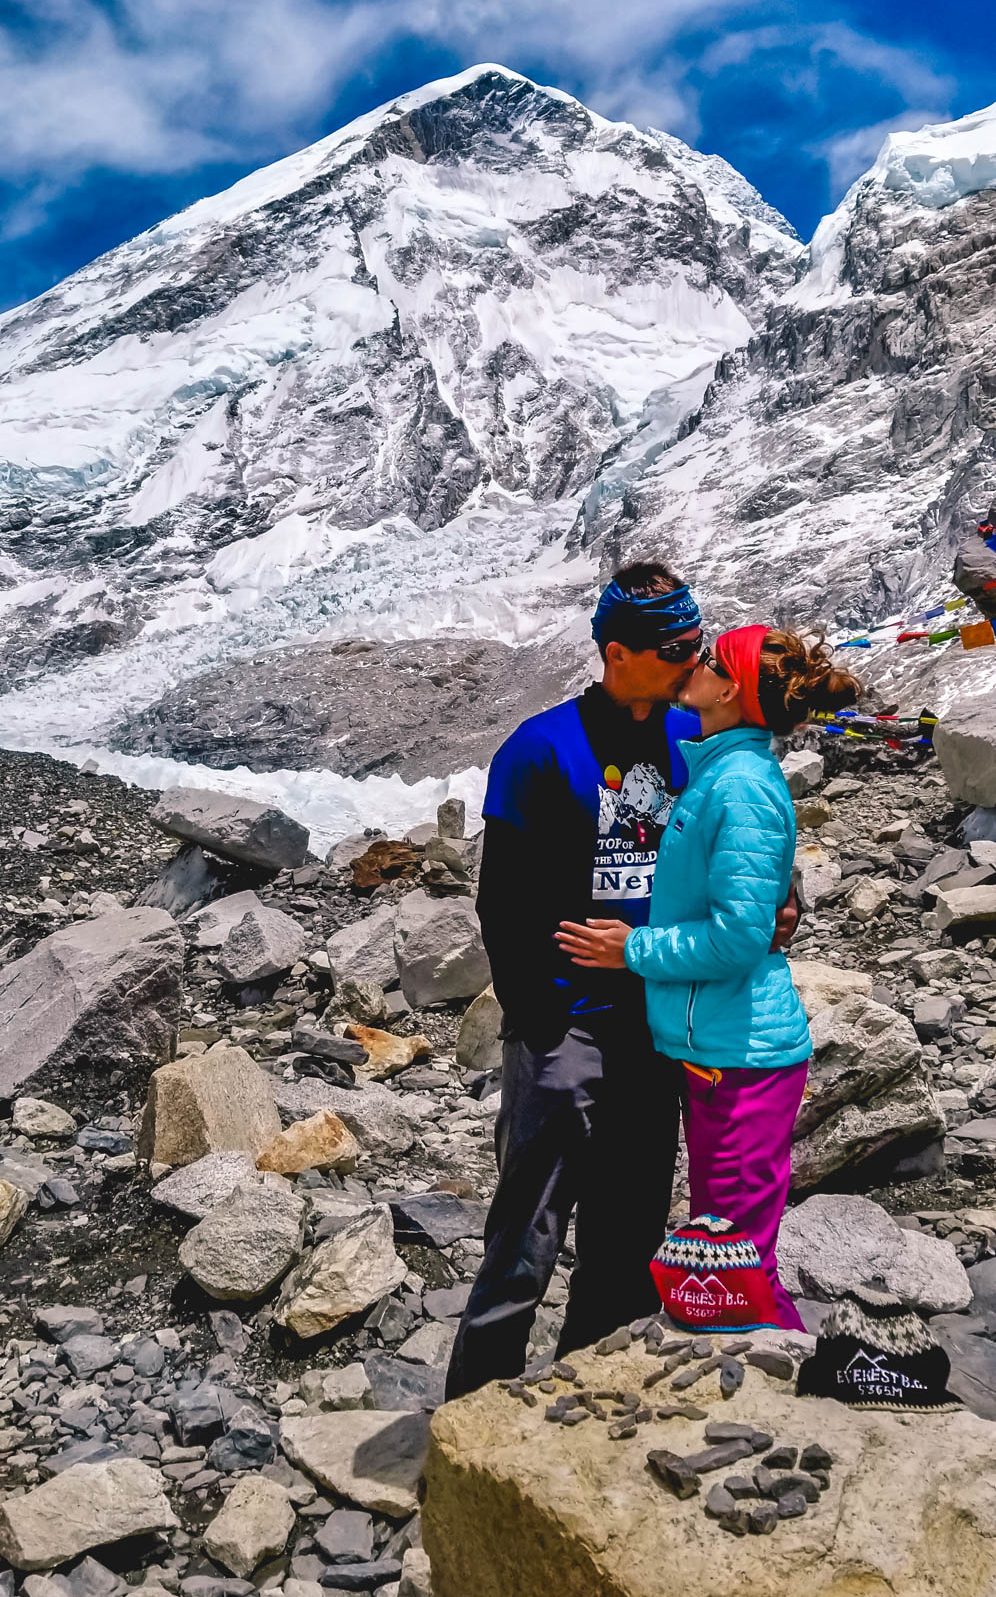
Nepal is home to eight of the fourteen highest peaks on the planet with Mt. Everest being the tallest in the world. It’s no wonder there are so many tourists who flock to Nepal every year to hike to Everest Base Camp. This was on the top of Kurt’s bucket list and was my #1 dream.
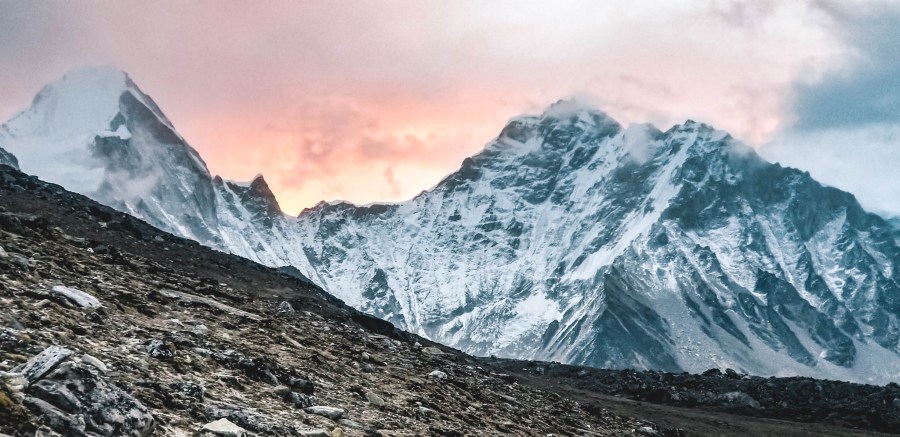
Our journey brought us through the magnificent mountain ranges of the Himalayas allowing us to see some of the most dramatic and picturesque landscapes. This was our favorite journey on our seven month backpacking trip and we are honored to help you prepare for this journey of a lifetime.
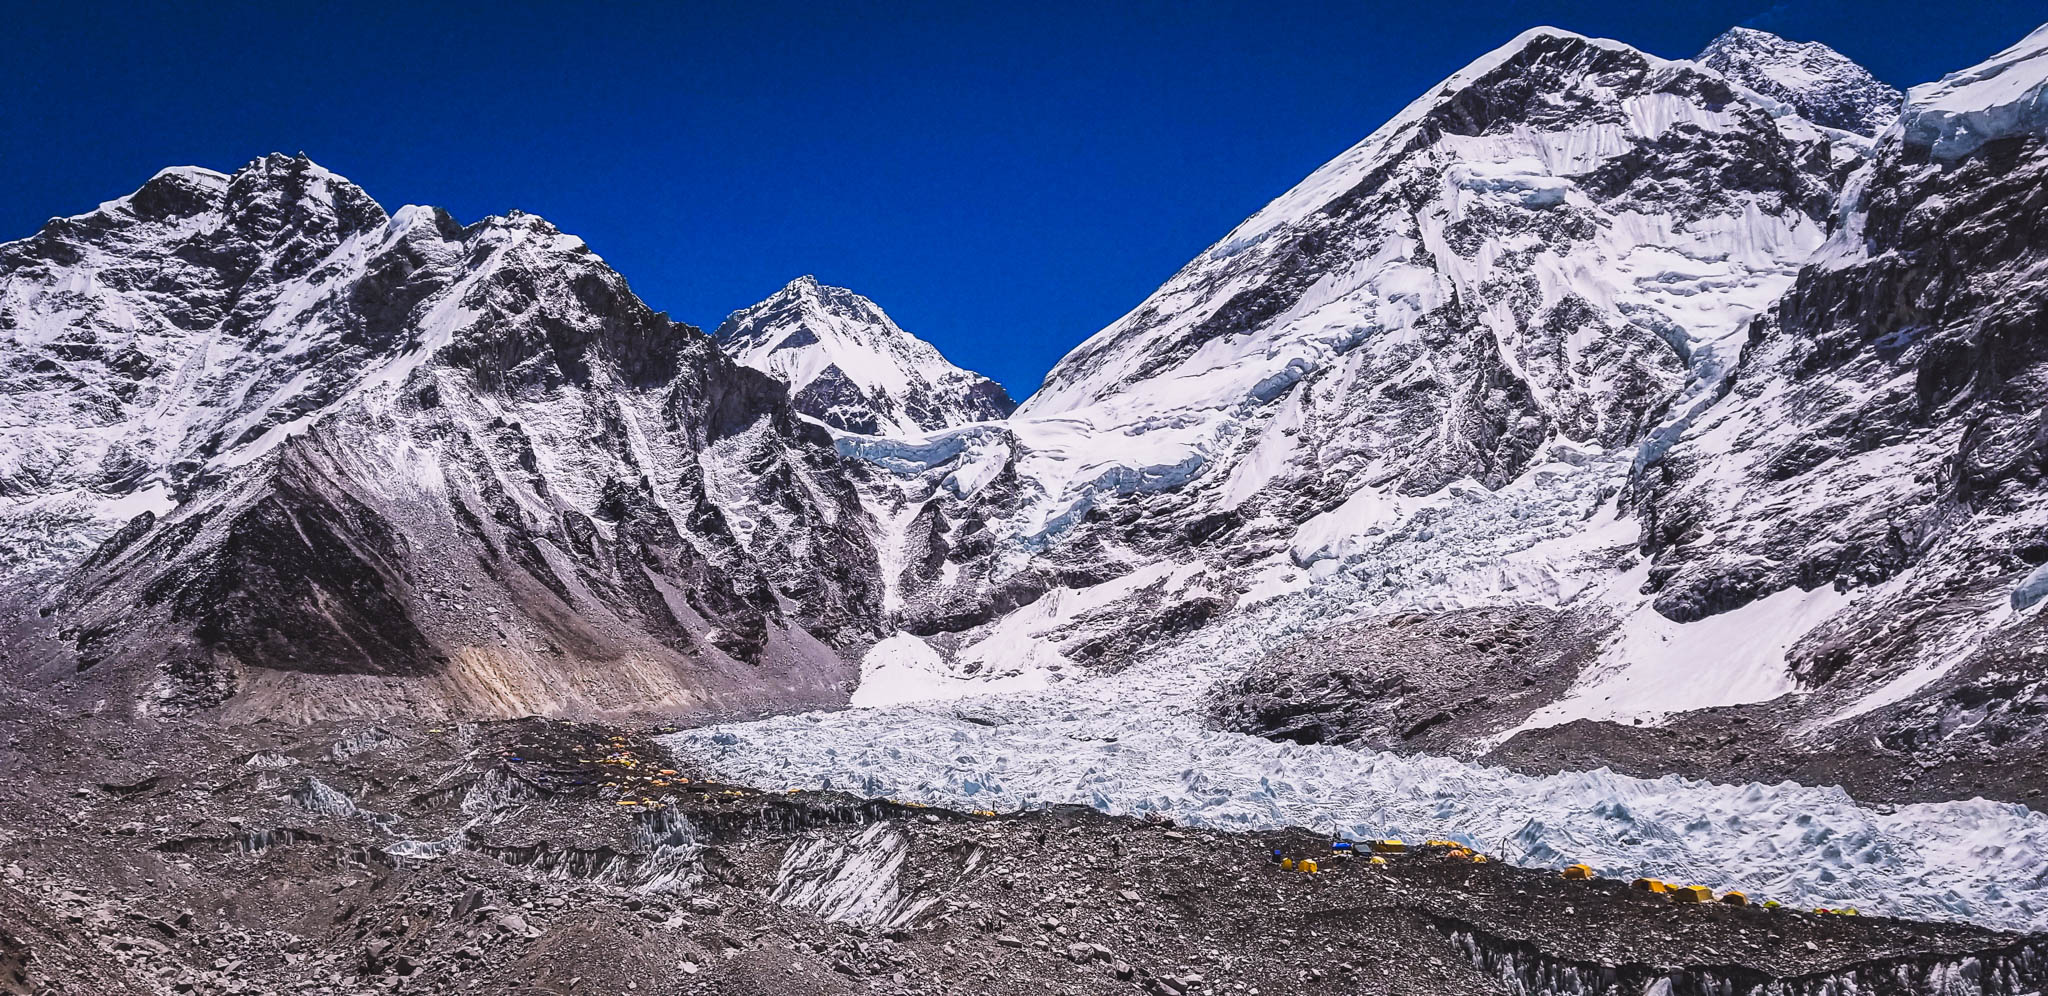
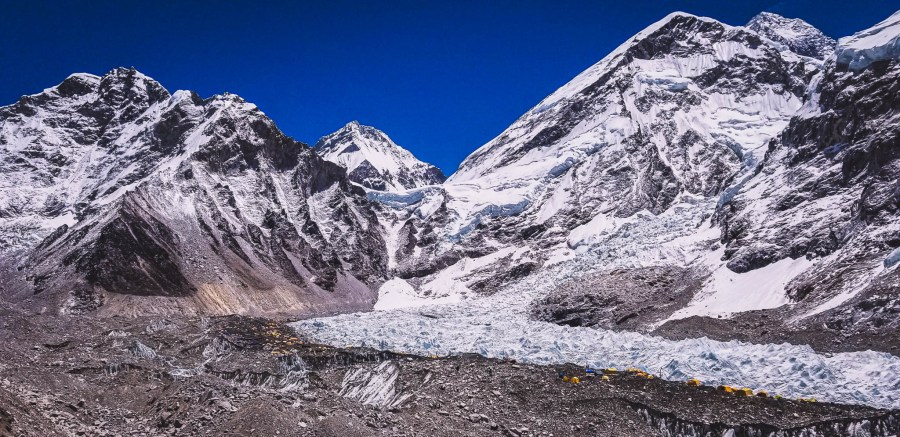
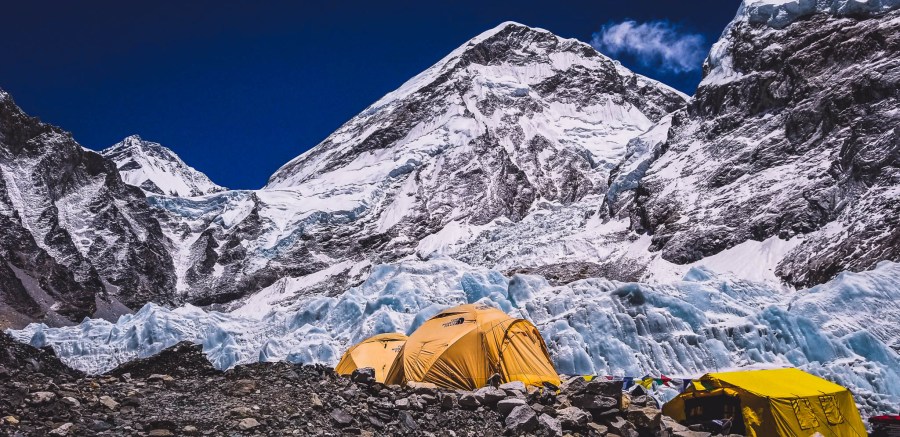
For those wishing to summit Mt. Everest, we’d recommend a different webpage to help plan your journey. We considered planning to summit Mt. Everest briefly, but due to the exorbitant amount of money it costs to summit Everest and the possibility of death we passed and opted for the amazing trek to Everest Base Camp (EBC) instead. For reference, the altitude at base camp is 5,364 meters / 17,598 feet and the altitude at the summit of Everest is 8,848 meters / 29,032 feet. A huge difference!
Table of Contents
- Best Time to Go to Everest Base Camp
- How Much Does an Everest Base Camp Trek Cost?
- Where Do You Start the Trek
- How Long Does it Take to Trek to Everest Base Camp?
- Do I need a Guide (Sherpa/Porter)?
- What Does a Day Look Like?/What’s it Like Trekking to Everest Base Camp?
- How Fit Do I Need to Be to Trek to Everest Base Camp?
- What Should I Bring to Everest Base Camp?/Packing List
- Accommodation- Where to Stay on a Trek to Everest Base Camp
- Staying Healthy on Your Trek
Best Time to Go to Everest Base Camp
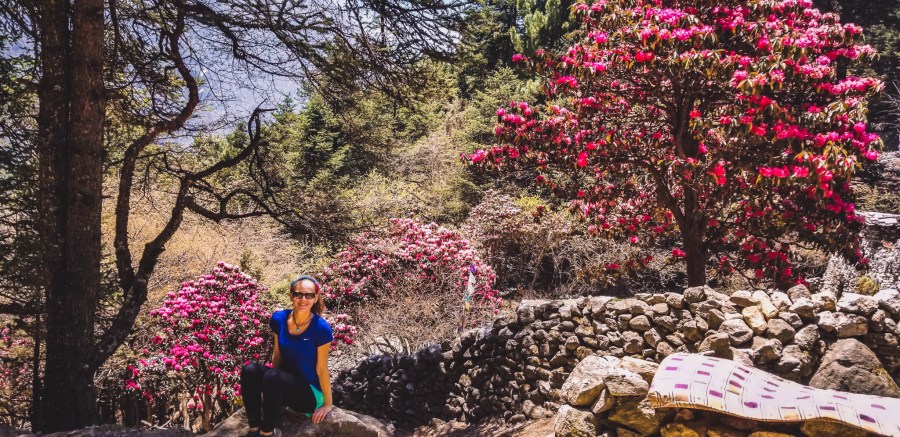
March through May/Spring season are considered the best months to trek, as you can enjoy the warmest weather of the year, clear blue skies, and the blooming Rhododendron Forest. For those trying to summit Mount Everest, this is also one of the best windows to reach the top.
October through November/Winter season are very popular, as well, as there tends to be less cloud coverage offering better/clearer views. However, it is certainly has colder temperatures compared to spring.
How Much Does an Everest Base Camp Trek Cost?
Below are some of the expected costs (in US $ ) of trekking EBC without an agency/tour company. Typically the prices are cheaper at lower elevations and more expensive in the higher elevation villages as shown in the price ranges quoted below.
- Sherpa ($20-$25/day) – With optional (but highly recommended) tip at the end. We highly recommend hiring a sherpa to save your body and allow you to enjoy the sights. Also, it supports the local culture and you may make a friend for life like we did. Please see “Do I Need a Guide” section below for more information on what to expect and why you SHOULD hire a sherpa or porter.
- Tea House Lodging ($1-$8) – is the general range for budget accommodation. Typically prices increase as you gain elevation and it’s a general rule of thumb that if you stay at a tea house they expect you to buy your meals there. There are also some more expensive options in certain villages that offer more amenities for a higher cost. Refer to our “Accommodation” section for more information on what to expect from the tea houses.
- Breakfast/Lunch/Dinner ($20-$30 person/day) – Warm meals and hot tea are available at the tea houses. The staple of Nepal is Dhal Baht which consists of lentil soup, rice, veggies and curry. Other common menu items include hot soups, momo’s (dumplings), pasta (or their take on it), porridge (oatmeal), french fries (pretty much potatoes cut up and boiled), and a variation of egg dishes.
- Boiled Water ($1-$3/cup or $3-$5/1L thermos) for Tea – Having hot tea is very enjoyable after a long walk. We suggest bringing your own favorite tea bags.
- Snacks ($1-$6/piece) – Snacks are generally a dollar or two at lower elevations but we saw a can of Pringles going for $7 in a village near EBC (as mentioned costs get higher as you gain elevation/get to more remote areas).
- Electricity ($2-$7/hour) – Most tea houses have electricity usually located in the communal areas. At lower elevations, they may charge you a few bucks to leave your device in all night or up to as much as $7 for an hour at higher elevations. Set aside some cash if you want to keep multiple devices fully charged.
- Bottles of Water ($1-$6/1L) – The sink and nearby river is not potable, but bottled water is available for purchase along the trek. You can consider taking a filtration straw or other filtration method to save money and reduce plastic consumption.
- WI-FI ($2-$10/hour) The connectivity is not always reliable, so keep that in mind when you are considering needing internet
- Shower ($4-$7/shower) – And we’re not talking a hot water bubble bath. Often times it will be a “bucket shower” (you get one bucket of hot water that is poured through a spout). The one bucket shower we took was actually quite nice. The water was hot and lasted for both of us” We took about 3 showers each during the 15 day trek.
- Laundry – Forget it
- Equipment ($1-$500+)– This can range depending on what you want/need. See our “What should I bring” section for more information.
- One Time Fees
- Sagarmatha National Park Fee ($35)
- Registration ($20) – Trekker Information Management System (TIMS) Registration Fee
- Travel Insurance ($6/day) This expense is optional but recommended in case of emergency. We got our insurance from “World Nomads” and they charge roughly $6/day.
- Roundtrip flight $360 (Departing from Kathmandu to Lukla and returning back to Kathmandu) – This is optional if you want to add another four to six day hike to get to Lukla from Jiri. See “Where Do You Start the Trek?” section below.
- Flight to Kathmandu ($) Depends on where you are coming from.
- Tourist Visa – You can get a visa on arrival which can be purchased at the border or airport with fees listed below:
Nepal Tourist Visa Fees
| 15 Days (Multiple Entry) | USD $30 |
| 30 Days (Multiple Entry) | USD $50 |
| 90 Days (Multiple Entry) | USD $125 |
Looking for ways to save money on the trek? Check out “What Should I bring to Everest Base Camp?” below.
Where Do You Start the Trek?
- Fly in to Lukla – The most common way is to take a flight into Lukla airport, one of the most unique airports in the world and start hiking from Lukla. (This is what we did).
- From Jiri by foot – You can also start your route from Jiri. This involves taking a jeep ride from Kathmandu to Jiri. You will then hike around four to six days from Jiri to get to Lukla. We didn’t even consider taking this route as it is at lower elevation and we wanted to save our time for higher up.

Tenzing Hilary airport: Nestled between the foothills of the Himalayas at 2,850m/ 9,350 feet above sea level is a short 1,700 foot uphill landing strip known as Lukla Airport. The airport is known for it's short runway and common dangerous conditions including: wind, inclement weather, cloud coverage between the mountains, and high altitude/low pressure. The runway is so short it is actually angled uphill to assist planes with slowing down. This will most likely be the start of your Everest journey.
How Long Does it Take to Trek to Everest Base Camp?
The length of time needed to hike to Everest Base Camp varies on the route you want to take and the amount of rest days needed. Below are some of the standard routes and estimates. We highly recommend the EBC and Gokyo Lakes Trek which only adds two to three days to the classic route.
- Standard/Classic EBC Route – The standard route generally takes 12 to 13 days starting in Lukla and reaching Everest Base Camp by day 9 or 10. Then returning the same route back to Lukla by days 12 to 13. The number of days it takes can vary depending on how quickly or slowly you want to go. Quicker is not recommended as you generally need rest days to get used to the elevation changes.

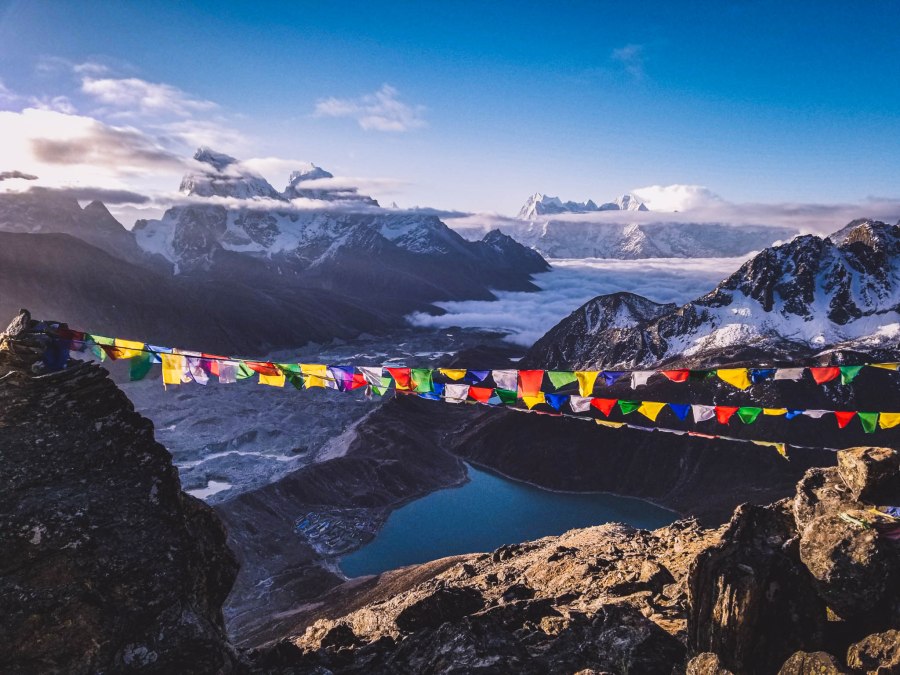
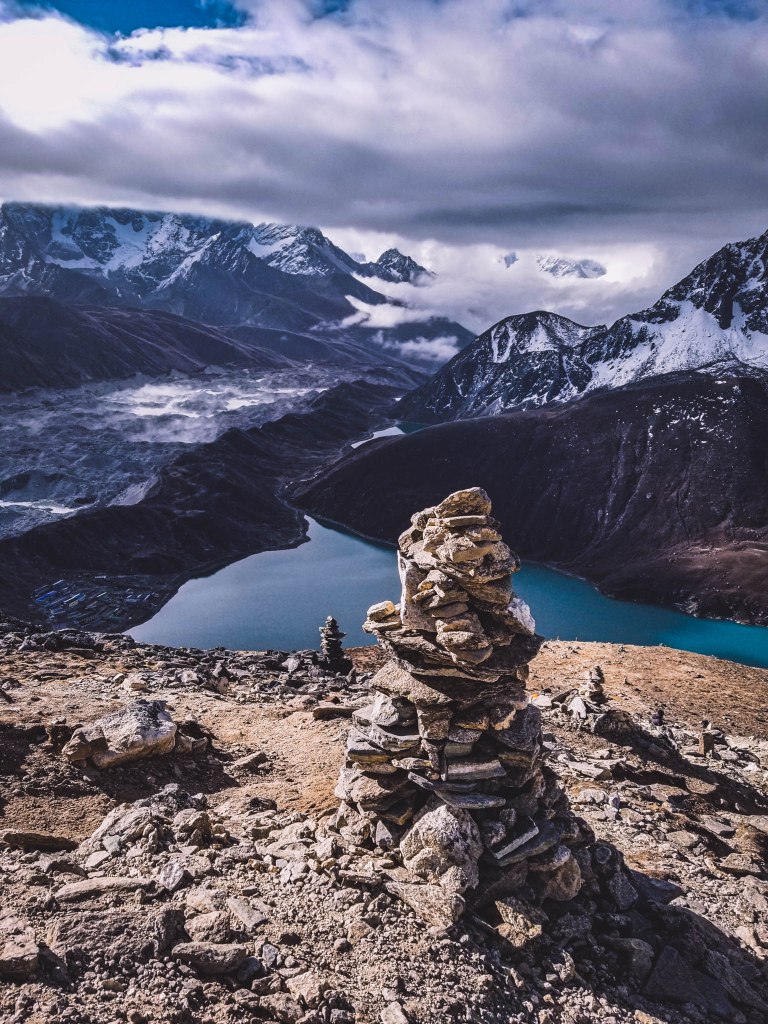
- EBC and Gokyo Lakes Trek – This route generally takes 15 to 16 days. The route takes the “classic EBC route” to get to EBC (generally by day 9 or 10) and then takes a detour from the classic route using the Chola Pass to get to the Gokyo Lakes (generally by day 12). From Gokyo, you then start your return route to Lukla which has minimal overlap from the route already taken. You will reach Lukla by day by 15 or 16. This is the route we took and we would highly recommend it as the Gokyo Lakes and views from the peak of Gokyo are some of the most amazing views we saw on our trek. This route can also be done in reverse going from Lukla>Gokyo>EBC>Back to Lukla via the classic EBC route.
- The Three Passes Trek – This circuit generally takes 21 days to complete and includes the routes taken for the EBC and Gokyo Lakes Trek (which includes the Cho La Pass) but also includes the passes of Renjo La and Kongma La. This is known as one of the toughest treks in the region. During the Three Passes Trek you summit three great peaks: Gokyo Ri, Kala Patar and Chukhung Ri.
- Other – Other trekking options and side hikes are available that you can tailor depending on your wants and time availability.
For reference here was our itinerary for our EBC and Gokyo Lakes Trek:
Day 1 • Lukla • Phakding
Day 2 • Phakding • Namche Bazar
Day 3 • Namche Bazar Acclimatization Day
Day 4 • Namche Bazar •Tengoboche • Dingboche
Day 5 • Tengoboche • Dingboche
Day 6 • Dingboche Acclimatization Day
Day 7 • Dinboche • Lobuche
Day 8 • Lobuche • Gorak Shep
Day 9 • Gorak Shep • Everest Base Camp • Gorak Shep
Day 10 • Gorak Shep • Kala Patthar • Dzongla
Day 11 • Dzongla • Dragnag
Day 12 • Dragnag • Gokyo
Day 13 • Gokyo • Gokyo Ri
Day 14 • Dole • Namche Bazar
Day 15 • Namche Bazar • Lukla
Do I Need a Guide (Sherpa/Porter)?
What is the difference between a sherpa and a porter? A sherpa will personally guide you the entire trek and can carry a set amount of weight, while a porter will carry the bulk of your belongings and not trek alongside you. If you have a large amount of weight or multiple people in your party you may need a sherpa or a porter or both.
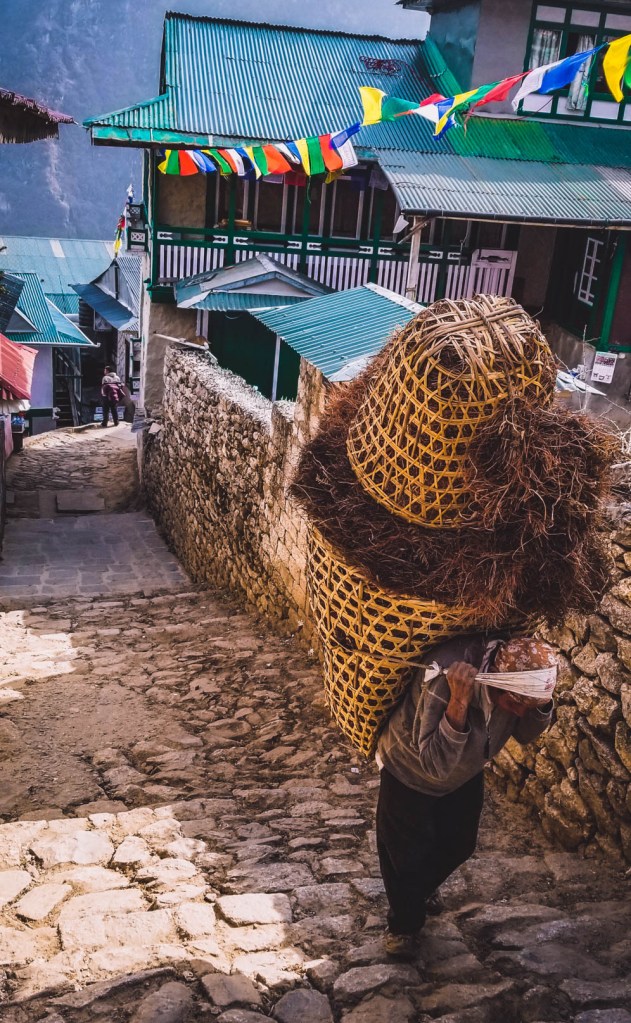
Having only a porter is not as intimate of an experience as a sherpa but it is the cheaper option. Porters are often paid by the kilo. They are the ones you see carrying unimaginable weight loads on their backs as they pass by. It is not uncommon for them to carry weights heavier than themselves.
Sherpas are indigenous to the Himalayan region and are trained in climbing, carrying heavy loads on their backs, and maintaining endurance in high altitudes. Sherpas are the unsung heroes of the Everest Expeditions.
Mt. Everest Base Camp Trek 101: Hire a sherpa and/or a porter. It will save you body, allow you to focus on enjoying the hike, and carrying your pack will be one less thing to worry about.
We would recommend hiring a sherpa for the following reasons:
- Safer – A sherpa knows the route and will keep you on track and out of danger
- Limits Body Soreness – A sherpa will carry your full pack, depending on how much weight you have, which makes the trek less taxing. It will still be a lot of work even without carrier your own load.
- Helps Support the Local Economy – The people in the villages depend on tourists for their livelihood.
- Gain a knowledge for the Himalayas and Nepalese Culture – The sherpas have a general knowledge of the Mountain Ranges and a skilled sherpa can teach you all you want to know about the wonderful Nepalese.
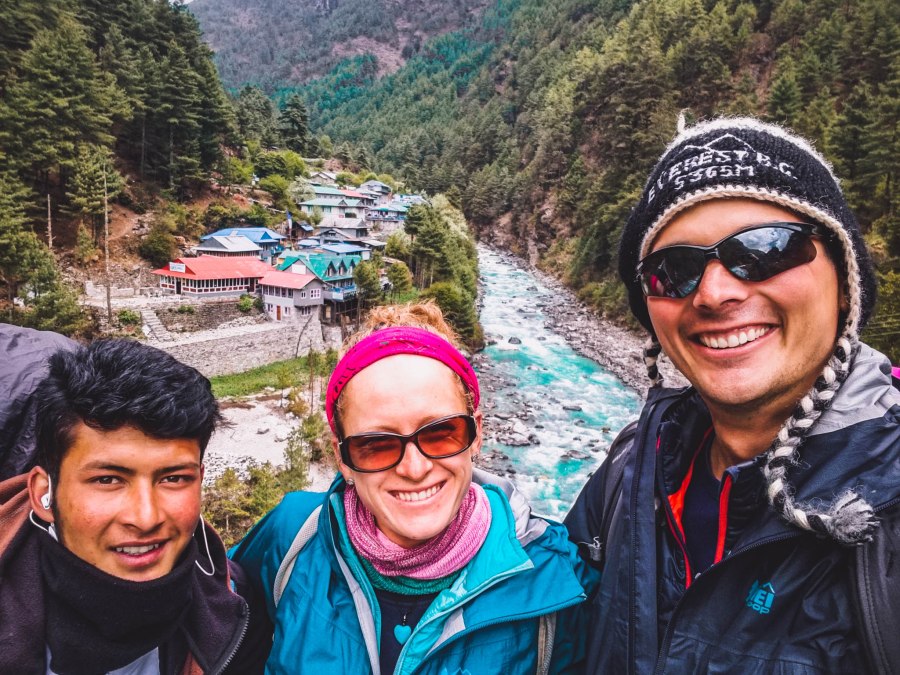
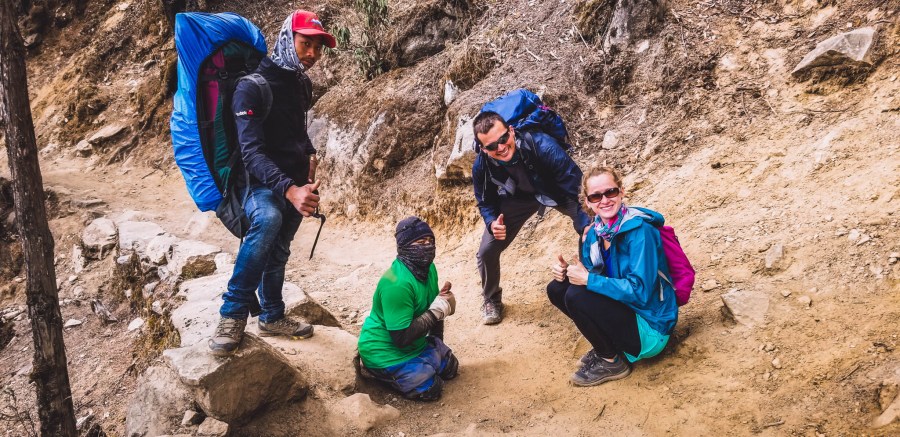
- Share a Special Bond – A skilled sherpa/guide will keep you company and make you smile everyday. Our amazing sherpa, Govinda, even routinely took photos for us which we otherwise would not have been able to get.
- Saves Time – A sherpa/guide books all the tea houses for you so you don’t have to research and waste time.
- Accountable – A sherpa will also help push you out the door to make sure you are starting your trek at a recommended time.
We started the first couple of our days without a sherpa; carrying our own packs which were around 25 pounds each. Those days were difficult and we had to stop several times because of how sore our backs would get. We hired our sherpa Govinda in Namche and couldn’t imagine not having him the rest of the trip.
- Sherpas have a maximum weight load they will carry but we certainly saw many sherpas/porters carrying well above what we would recommend.
- Average cost of a licensed sherpa is about $25 USD per day and the price covers their meals, water, stay, and labor. A generous tip at the end of the trip is highly recommended.
Somber Fact: 1/3 of people who have died on Mount Everest have been sherpas. The role of a sherpa for those summiting Everest is a very dangerous and taxing job, though it is the most lucrative job in the country.
Mount Everest 101: Always be mindful to let sherpas and porters pass you safely. They are carrying loads you couldn't imagine. Stay to the side of that trail when you see them approaching and give them a "Namaste" meaning (a warm greeting). It will make them smile.
What Does a Day Look Like?/What’s it Like Trekking to Everest Base Camp?
- Hikes range from three hours to nine hours per day. There are rest days, but generally you are hiking on those days to acclimatize and enjoy more of the beauty the trek has to offer. One of our toughest days was actually during a “rest” day.
- Single day elevation gains can be as much as 673 meters (2,207 feet) or more if you try and shorten the recommended routes. It is not recommended because it increases the risk of more serious altitude sickness.
- Expect to sweat and lose your breath. The trek is pretty grueling for those in good shape and those in average shape. Altitude has varying affects on each person which determines how fast you go and how difficult it will be. We recommend carrying Diamox, a drug to help your body acclimate and deter altitude sickness.
- The standard path does not require technical climbing. Meaning no harnesses, ropes, etc to complete. You need a pair of boots and yourself.
- The standard path is not overly dangerous. The paths are generally pretty wide and you aren’t skirting around tight cliff faces where it’s easy to slip and fall. Don’t get us wrong, you need to always be careful and be aware of your surroundings. There are cliffs, so if you are aloof or not paying attention you can fatally hurt yourself. If you add Cho La Pass there are some more dangerous parts, which is why a sherpa/guide is important.
Trekking 101: "Slow and Steady" - The key to a successful trek is take every step at a slow-moderate pace. Don't overdo it and think you can do more than your body allows. It is not a sprint but a marathon.
- You will likely experience some level of altitude sickness (“AMS” or “acute mountain sickness”. This can affect anybody. We are a fit couple and both had our issues with it throughout the trek. The symptoms can feel like a moderate to severe hangover – dizziness, headache, muscle aches, nausea. AMS can become severe in extreme cases, which is known as High Altitude Pulmonary Edema (HAPE), which is buildup of fluid in the lungs that can be very dangerous and even life threatening. If your symptoms continue to worsen, descend until you start feeling better.
Mt. Everest Base Camp Trek 101: HIKE HIGH, SLEEP LOW. On "rest days" it is recommended to climb higher than where you will sleep at as it will do wonders for helping your body get used to the altitude. It is highly recommended to take a "rest day" in both Namche Bazaar and Dingboche when hiking the classic EBC route.
- It can be a challenge waking up early – Sometimes waking up early the next day is a real challenge. Especially after multiple days in a row of long hikes, knowing you are getting up for another long one. But with incredible views like this, it will keep you pressing on.
How Fit Do I Need To Be to Trek to Everest Base Camp?
Physical Rating: Challenging. You should be in decent physical shape and be able to handle long three to nine hour day hikes. As far as high-altitude hiking, acclimatization is something everybody struggles with along the hike, but exercise and cardio (specifically the stair-master) beforehand will certainly help you with that.
Again, the key here is to take the trek nice and slow, one foot after the other. You will not succeed if you go as fast as you can. As you gain elevation it will become harder to breathe as there is less oxygen, but don’t worry, if at any point you feel AMS (acute mountain sickness, due to high elevation) you can always acclimate and spend an extra day to relax.
If at any point your condition worsens and you’re not getting any better hike down. When you’re ready to continue you can press on. Also, Diamox is your friend. We generally do not condone pharmaceuticals, but this made things possible for us.
Then there is the superhuman Adam, who was the first disabled climber to reach Mount Everest Base Camp using only his hands. He was inspiring. So if you think you can’t, think again, and remember Adam.
Another friend we met on the trek, Souchek, was 69 years old. He has done this trek a handful of times. Between Adam above and Souchek at 69 years old it shows that all you need is determination to reach EBC.
What Should I Bring to Everest Base Camp?/Packing List
Keep in mind almost anything and everything on this list can be purchased/rented in Kathmandu or along your trek. But if you purchase while trekking it will be at least two times the cost or more compared to Kathmandu and may not be the same quality.
Laundry isn’t really a thing on the trek so don’t expect to bring multiple outfits. In fact, we hardly changed clothes at all during the whole trek. We pretty much ended up wearing most of our clothes as layers (at the same time) and stripping them off or putting them back on as needed. This is why LAYERS are important.
We rented most of our gear like sleeping bags and jackets because we were in the midst of a 7-month backpacking trip (check that out here) and we didn’t have cold-weather clothing. So you don’t have to bring everything. There are many cheap options in Kathmandu for you to purchase or rent gear. But to prepare yourself here is a packing/trekking gear list.
For as little as $1 USD/day, you can rent most anything you need—comfortable down jackets, sleeping bags, and backpacks. Just be sure to shop around to inspect for cleanliness and check that the gear is not damaged. Last thing you want up in the mountains is a sleeping bag with a big hole in it. Renting is also a good way to keep your luggage light if you are flying into Kathmandu, or if you do not trek often then it absolutely makes sense.
Many of the following items are optional; tailor the list to suit your personal needs.
Trekking Clothing
- Wicking, quick-dry boxers or briefs (3)
- Wicking, quick-dry sports bra (for women)
- Heavyweight long underwear bottoms
- Heavyweight long underwear top
- Mid-weight long underwear bottoms
- Mid-weight long underwear top
- Wool/synthetic/moisture wicking shirts (2)
- Mid-weight fleece or soft-shell jacket (2)
- Mid-weight down or synthetic parka with hood
- Convertible hiking pants (a nice feature as you will heat up and cool down several times)
- Fleece pants or insulated pants
- Lightweight waterproof/breathable rain jacket
- Lightweight waterproof/breathable rain pants
- Mid-weight fleece gloves or wool gloves
- Mid-weight waterproof gloves or mittens
- Mid-weight fleece/wool winter hat
- Sun hat
- Mid-weight wool or synthetic socks (3 pairs)
- Buff/Insulated Face Mask/Gator/Balaclava – You will be breathing heavy along the hike, the exposed valley winds will be slamming you in the face and the Khumbu Cough is more than likely to get you. Khumbu Cough (The High Altitude Hacking Cough) is a dry cough caused by the low humidity and temperatures associated with high altitudes and breathing in all the dust.
- Gaiters (for winter; optional)
Toiletries
- Toothbrush (travel size)
- Toothpaste (travel size)
- Tissues – And plenty of it! Tea houses sell toilet paper (and tissues) at a cost.
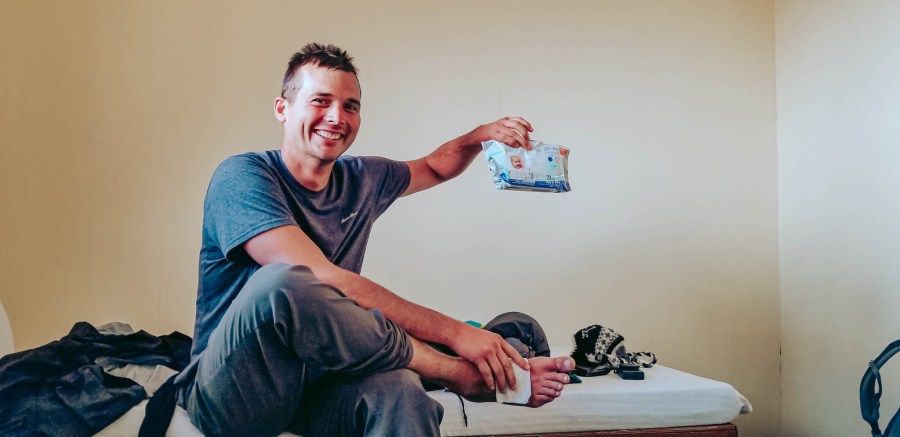
- Baby Wipes (You’re welcome) – For cleaning up each day. Showers cost extra along the trek and many times they are not available or you don’t want to shower in the freezing temperatures of the tea houses.
- Antibacterial Gel – life saver during all bathroom breaks (soap isn’t provided)
- Women’s hygiene items
- Sunscreen -SPF 30 or higher – Sun exposure is greater at higher altitudes
- Lip balm (SPF 30 or higher)
- Dry Shampoo and Shampoo and Conditioner
- Soap
- Deodorant
- Dental floss
- Throat Lozenges – Boy, these would’ve been nice when we were hacking out lungs out due to the Khumbu Cough
- Razor and shaving cream – (optional, depending how rugged you want to look)
- Eyeglasses or contact lenses (if you wear them)
- Non-prescription medications (pain reliever/fever reducer, antibiotic ointment, allergy treatment, etc.)
- Prescription medications; medications for traveler’s diarrhea
- Diamox (can prevent altitude sickness)
- Small and Large Towel – For when you want to wipe your sweat during trekking, when you want to shower, or wipe your hands after a bathroom visit
Trekking Equipment
- Heavy-duty Backpack
- Gregory Mountain Backpacking Pack – We absolutely loved ours backpacks. You need something big enough to fit all the essentials but not too big because you (or a sherpa) will have to carry the load. I used a 70L backpack and Kurt used a 75L. Make sure your backpack is waterproof, as the last thing you need is an entire pack full of water.
- Day pack – a lightweight backpack is really nice to carry around for “rest days” (our backpacks included them).
- Eagle Creek Packing Cubes – THESE ARE A GOD SEND. These are ideal for ANY trip.
- Sleeping bag (rated to -20°C/0°F) (dependent upon season, weather forecast and personal preference)
- Waterproof hiking boots – that are somewhat worn-in. We were fine with a low-cut hiking shoe, but you might want to invest in a mid-range.
- Camp shoes (down booties or running shoes) – It’s nice to have something at night to slip on/off at the tea houses during bathroom breaks
- LED headlamp with extra batteries– This was extremely handy when I couldn’t stand the smell of the bathroom in the middle of the night I had to go outside. Also, of course for those sunrise hikes or in case you get caught in the dark.
- Trekking poles (optional; we didn’t use them)
Food
- Energy Bars
- Electrolyte replacement drink mix
- Snacks (protein bars, nuts, trail mix, etc) – We opted for chocolate bars and coconut chunks, excellent combination, however trail mix is an excellent option). You will need snacks during those long day treks.
- Tea Bags – It’s nice to have your favorites on hand, or just buy their selection
Personal Items
- Water Canteen (Yeti is our go-to)
- Camera
- Spare camera battery and charger
- Spare camera memory card
- Personal first-aid kit
- Sunglasses (with UV protection)
- Travel wallet
- Travel plug adapters (C, D and M) – helps the plugs on your electronics adapt to the shape of foreign outlets
- Electrical converter – changes the voltage found in an outlet to match that of your device
- Ear plugs (if you’re a light sleeper)
- Hand and toe warmers
- Cash (Nepalese rupees and U.S. dollars in small denominations) – To pay for the tea houses, pay/tips for sherpas/porters, pay for any additional necessities like meals, water bottles, showers, wifi, and toiletries.
- Credit card (in case you run out of cash there are some ATM’s)
- Cell phone in waterproof case
- Cell phone charging cable
- Local SIM card for cell phone (purchase in Nepal)
- Portable power device (for recharging phone or other electronics)
- A deck of cards/your favorite portable game
Travel Documents
- Airline tickets (confirmation and itinerary)
- Nepal Visa form (may be obtained at Kathmandu Airport)
- Travel insurance policy documents
- Valid passport
- Copy of passport (2 copies, first page only)
- Passport photos (4)
Trying to save some money: Bring your own equipment from above (rather than renting or purchasing in Nepal). Additionally, some alternatives to save money would be to bring a solar charger (to avoid paying for electricity), power bank (to avoid paying for electricity), baby wipes (instead of paying for showers), and a water filtration system (to avoid paying for water…you’re going to need a lot).
Check out these items that we used for our EBC Trek and use on a regular basis when traveling.


*Disclosure: We only recommend products we use or would use ourselves and all opinions expressed here are our own. This post may contain affiliate links at no additional cost to you. We may earn a small commission. Read full privacy policy here.

Accommodation/Where to Stay on a trek to Everest Base Camp
You stay in basic lodges called tea houses or you can camp if you’re part of an organized tour. Tea houses will be your home for the night. They are not like your traditional hotel with all the amenities. Tea house pricing is heavily discounted on the unwritten agreement that each individual will eat at least two meals per day at the lodge.
What’s included in your tea house stay?
- Low cost, minimalist accommodation. We paid roughly $3-$5 USD per night. It is generally expected that you will eat at your accommodation and prices generally increase as you get further along the trek and higher in altitude.
- A bed, blanket and a pillow
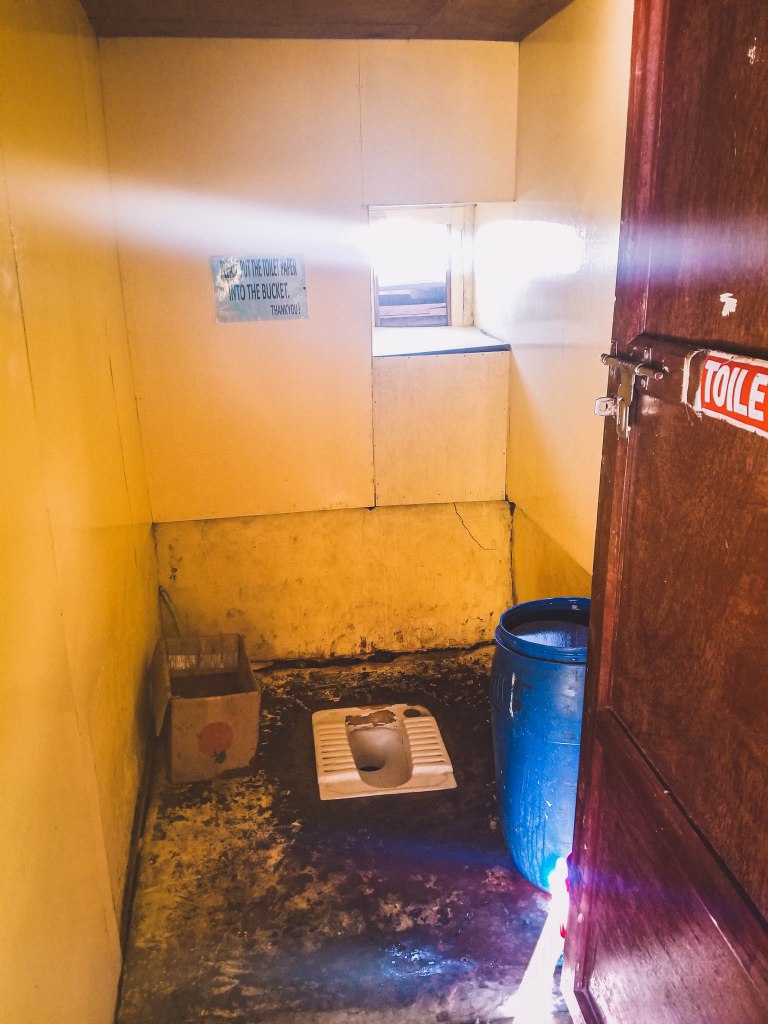
- A communal toilet/hole in the ground- The higher up you go the worse the toilets get, as in the toilet is a hole in the ground and you “flush” with a bucket of water. You have to bring/pay for toilet paper and hand soap.
- A single room with a bed(s)
- Dinner and breakfast is not included. Cost can range from $2 to $10 USD per meal with prices generally increasing as you get farther along the trek.
- Heat (maybe and time limited) – They generally do not have electric or gas powered heaters, but most lodges have a large yak poo burning stove in the communal area to heat the room. Yes, you read that correctly, a yak poo burning stove”. You must bring your own sleeping bag as the communal stove heat (which only burns for a few hours during the evening won’t reach your room and the comforters provided will not keep you warm. Sometimes there is no burning stove at all.
- The communal area is a great place to unwind after your day hike and converse with other travelers and your guides.
- A shower/bucket shower is extra $$, and may not be too warm/hot.
A good reminder is that most villages have places you can buy necessities such as tissues, snacks, water, etc. Be sure to bring more than enough cash.
Don’t get too comfortable at your tea house like you are at home. We fell victim several times of walking quickly up the stairs only to be gasping for air shortly after. For some reason you forget about altitude when you are indoors.

Himalayas 101: Get accustomed to "toilets" being holes in the ground
Staying Healthy on Your Trek
- Keep a vegetarian/vegan diet during your hike. Be aware that there is a no-kill policy in the Sagamartha (Mount Everest) National Park. What does that mean for you? Meat has to be carried up from outside the National Park. Any meat that is carried up by porters along the trail is not refrigerated and is exposed to the hot sun while transporting…does that sound good to you?
- Eat what the local eats – Dhal Bhat. Dal Bhat is a nutritious Nepali dish of lentil soup, rice, vegetables, and curry. It is made fresh daily and is protein-packed to sustain all the energy you need to keep going. That is one of the many secrets to the strong sherpas of Nepal. We know several fellow trekkers that had meat or dairy along the hike and got sick. So we stayed away from it.
"Dhal Bhat power, 24 hour, No Toilet, No Shower" This a funny Nepalese saying as Sherpa's tend to eat Dhal Bhat ("Dhal Bhat power") for the majority of their meals and seem to have endless amounts of energy ("24 hour") and seem to never use the bathroom ("no toilet") and like most everyone else on the trek, don't shower ("no shower").
- Take your time – Don’t forget “slow and steady”, focus on your breathing and don’t over-exert yourself. Take many breaks (as if I have to tell you). If you feel off notify someone, don’t just keep going. Be smart.
- Wear a mask while trekking – You are high up in the mountains and while wind is a factor, the lack of oxygen and low temperatures will take a toll on your breathing. We both developed the treacherous Khumbu Cough even though we wore our masks a majority of the time. Kurt experienced an extreme case of Khumbu Cough and strained his abs from all the coughing. Don’t worry, it goes away eventually after you descend, some longer than others, for us about a few weeks.
- Stay aware – Although the trail is well-traveled and usually marked, always keep your eyes in front of you. There will be steep cliffs, drop-offs, and bridges along your route. When taking pictures be on high alert of your surroundings. Listen for the bells of animals, and stand to the inside of the trail to avoid being knocked off. Always allow ample room for porters carrying loads to pass you safely. They are on an even more difficult journey than you and it is simply a sign of respect.
- Wear sunscreen – Do you want to add sunburnt to your list of ailments? Use sunscreen regularly or cover your skin with a long-sleeve top, long pants, and don’t forget your buff.
If you have the time, be sure to add Gokyo Trek to your itinerary. You will 100% not be disappointed.
ARE YOU READY TO BOOK? CONTACT US AND WE CAN HELP SET YOU UP WITH A GUIDE/SHERPA/PORTER. Any questions? We would be more than happy to help.
